Creating Fedora 24 bootable USB UEFI

This exmaple uses a previous fedora distribution to create the bootable USB for Fedora 24.

First, we install live cd tools which enable us to create live usb boot. Following command takes care of this,

$ sudo dnf -y install livecd-tools
output: http://collabedit.com/nwbmu

Afterwards, we get the ISO of Fedora. I choose cinnamon desktop spin. However, any fedora 24 ISO would work.

$ wget -c https://download.fedoraproject.org/pub/fedora/linux/releases/24\
/Spins/x86_64/iso/Fedora-Cinnamon-Live-x86_64-24-1.2.iso

We plug the USB disk into the computer and apply the command to make it a bootable containing fedora 24 Live image,

$ sudo livecd-iso-to-disk --format --reset-mbr --efi /home/atiq/FC_USB_Boot\
/Fedora-Cinnamon-Live-x86_64-24-1.2.iso /dev/sdb
Output: http://collabedit.com/phdqe

The command will ask you to confirm during creation of the boot. Probably press ‘Enter’ or whatever it asks to confirm.

To see current boot partition on the usb disk we do,

# parted /dev/sdb print
Model: SCSI DISK (scsi)
Disk /dev/sdb: 4034MB
Sector size (logical/physical): 512B/512B
Partition Table: gpt
Disk Flags: 

Number  Start   End     Size    File system  Name                  Flags
 1      1049kB  4032MB  4031MB  fat32        EFI System Partition  boot, legacy_boot, esp

That’s it. We are done. Now, plug the USB disk into a computer and start installation. Make sure that EFI/UEFI Boot is enabled in BIOS settings instead or has higher priority than legacy boot or disable legacy boot so that it has higher priority.

Rescuing Fedora on EFI Boot Systems

[Note: This article is about EFI systems, for legacy boot systems please have a look at other links (under dev).]

Introduction

This article is for people who overwritten/modified by /boot/efi and cannot boot into Fedora anymore. This can happen due to several reasons,

  • You installed an OS like Windows and unfortunately, that touched fedora efi files. (should not happen, but worst case)
  • You installed another linux that just overwrote your efi binaries in /boot/efi or updated menu entries (/boot/efi/EFI/fedora/grub.cfg) and made old entry not bootable.

Booting into the System

GRUB2 Prompt

If your system boots into a black screen GRUB2 prompt apply command like following to boot into fedora first (assuming, sda6 is the partition where your fedora is installed.),

set root=’hd0,gpt6’
linuxefi /boot/vmlinuz-4.5.7-300.fc24.x86_64 root=/dev/sda6
initrd efi /boot/initramfs-4.5.7-300.fc24.x86_64.img

Live USB Disk

Create a live bootable fedora USB following this link (under dev). When you boot from the USB disk you can edit menu entries (by pressing ‘e’ or pressing ‘c’ then enter commands) to boot into your old fedora system.

IF that seems tedious and your live usb disk fedora and the fedora you are trying to recover are of same version then you can apply next commands opening a terminal righer after booting the live USB.

Restoring /boot/efi

This is the most important part, reinstall following packages.

$ sudo dnf reinstall grub2-efi shim
Reinstalled:
  grub2-efi.x86_64 1:2.02-0.34.fc24           shim.x86_64 0.8-9

That takes care of putting EFI boot files properly into /boot/efi

Updating Grub Menu Entries

Finally, we apply grub2-mkconfig to update GRUB configuration file,

$ sudo grub2-mkconfig -o /boot/efi/EFI/fedora/grub.cfg
Generating grub configuration file ...
Found linux image: /boot/vmlinuz-4.5.7-300.fc24.x86_64
Found initrd image: /boot/initramfs-4.5.7-300.fc24.x86_64.img
Found linux image: /boot/vmlinuz-0-rescue-1b772ba3f5ee440ba9b87ea07a5388fc
Found initrd image: /boot/initramfs-0-rescue-1b772ba3f5ee440ba9b87ea07a5388fc.img
Found Windows Boot Manager on /dev/sda2@/EFI/Microsoft/Boot/bootmgfw.efi
Found Fedora release 23 (Twenty Three) on /dev/sda8
done

Side-Note

Following Fedora wiki GRUB2 instructions upto mk-config I found that modules package was not required. Afterwards I could see that fedora 24 entry made to the top in GRUB Menu list.

References

  1. Fedora wiki UEFI booting doc
  2. GRUB2 Intro and Conf Files
  3. EFI Instructions for Ubuntu – grub 2 efi more linux instructions
  4. non-EFI system linux
  5. Fedora 20 non-EFI

Creating Bootable USB Media of Fedora, RHEL, Cent-OS and Ubuntu using Linux and Windows

Safety of your data on the disk: first, I assume that, to follow provided instruction on this article, you are using a USB stick which does not contain valuable data or you have already made backup. I also assume that you have downloaded or acquired the ISO of the OS you want to put on the USB stick. Second, most of the commands in this article requires root privilege. Please get a shell for root or use sudo command.

USB Live Creation Tool Example
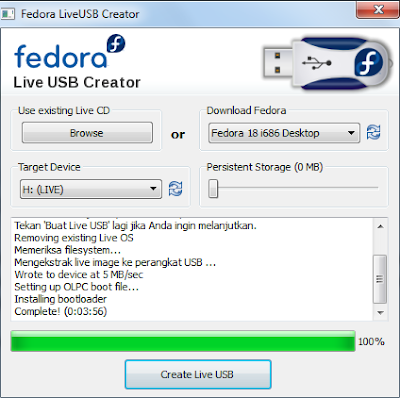
Figure 1: USB Live Creation Tool Example, click here to enlarge image.

Tools on Windows

Following tools with GUI on Windows can create bootable linux media using USB Stick.

  • Live USB Creator: it also has linux release: funny thing is, this also works with Cent OS and RHEL ISO release. You might need to use older versions for older releases of those OSs.
  • UNetbootin: it supports most of the Linux/Unix OSs.
  • BootFlash: especially used for puppy Linux
  • WinImage: you can copy a DVD/CD or filesystem image using this tool

These are easy to use tools. Hence, we are going to skip to Linux options to provide details.

Using dd on Linux

One of the easiest procedure is to use dd command to copy the ISO into target device. It is trivial yet powerful. However, it rewrites partition table of the USB drive and it might add entries in the partition table in such a way that it might look messed up to you. But, it is not a problem. After experiments are done, to fix/cleanup partition table of a drive you can always follow the article: cleanup-corrupt-partition-table to get your USB Disk’s partition table back at original condition. Following command puts the ISO into the USB drive sdX.

# dd if=~/Downloads/Fedora-18-x86_64-Live-Desktop.iso of=/dev/sdX bs=8M

For example, if your usb device is sdc, sdX can be replaced with sdc. Don’t put sdc1 instead of sdc because dd requires the device id not the partition of a device.

# dd if=~/Downloads/Fedora-18-x86_64-Live-Desktop.iso of=/dev/sdb bs=8M

In this way, we can create bootable USB Device with any bootable ISO.

Using livecd-tools on Linux

Being developed primary with Fedora, livecd-tools is one of the most powerful tools for creating live USB Media. If you are using Fedora, RHEL, Cent-OS or any like minded OS this is the tool to go. Let’s first see how to install this tool. Then we’ll go on to see how to use it.

Installing livecd-tools on Fedora/Cent-OS

Easiest way to install this tool is to use yum,

# yum -y install livecd-tools

Installing livecd-tools on RHEL/Cent-OS

On RHEL, we have to enable EPEL repository. On RHEL 6 64 bit you have to apply following command,

# yum localinstall http://dl.fedoraproject.org/pub/epel/6/x86_64/epel-release-6-8.noarch.rpm

On RHEL 6 32 bit apply following command,

# yum localinstall http://dl.fedoraproject.org/pub/epel/6/i386/epel-release-6-8.noarch.rpm

Still applying yum command to install livecd-tools would fail though it was supposed to work,

    # yum -y install livecd-tools
    --> Processing Dependency: /sbin/extlinux for package: 1:livecd-tools-13.4.5-1.el6.x86_64
    --> Finished Dependency Resolution
    Error: Package: 1:livecd-tools-13.4.5-1.el6.x86_64 (epel)
              Requires: /sbin/extlinux

    You could try using --skip-broken to work around the problem
    You could try running: rpm -Va --nofiles --nodigest

The reason is that, in most cases, dependency to package: syslinux-extlinux is not met. This package is not available with RHEL. However, we can find this package (for example, in rpmfind.net) in many repositories.

Use the package according to your system architecture. For demonstration I am using RHEL 6.5 64 bit package.

# yum localinstall ftp://195.220.108.108/linux/centos/6.5/os/\
x86_64/Packages/syslinux-extlinux-4.02-8.el6.x86_64.rpm

Now, install livecd-tools using previous command, this time it will complete without error,

# yum -y install livecd-tools

If you encounter more dependency error please follow article: saoslab – creating local repository of RHEL and then, come back here again.

Creating Bootable USB media using livecd-tools

By default, your USB stick should have a primary partition with boot flag set. ‘parted print’ command outputs similar to following in that case (USB stick attached to our system is sdc),

# parted /dev/sdb print
Model:  USB Disk (scsi)
Disk /dev/sdb: 8054MB
Sector size (logical/physical): 512B/512B
Partition Table: msdos
Disk Flags:
Number  Start   End     Size    Type     File system  Flags
 1      1049kB  8053MB  8052MB  primary               boot
mkfs -T ext4 /dev/sdb1
e2label /dev/sdb1 RHEL_7S_x86_64

If boot flag is not set you can set it using following command (assuming usb device is sdc),

# parted /dev/sdb print toggle 1 boot

Now let’s create ext4 filesystem on the partition and give it a label,

# mkfs -T ext4 /dev/sdb1
mke2fs 1.42.12 (29-Aug-2014)
/dev/sdb1 contains a vfat file system labelled 'ESD-USB'
Proceed anyway? (y,n) y
Creating filesystem with 984944 4k blocks and 246512 inodes
Filesystem UUID: bf01a09b-e103-44de-b477-ee9b399f8ec2
Superblock backups stored on blocks:
     32768, 98304, 163840, 229376, 294912, 819200, 884736

Allocating group tables: done                           
Writing inode tables: done                           
Creating journal (16384 blocks): done
Writing superblocks and filesystem accounting information: done

# e2label /dev/sdb1 RHEL_7S_x86_64

livecd-tool can prepare a bootable USB stick when used following command (assuming downloaded iso is in Downloads directory and usb device is sdc),

# livecd-iso-to-disk --reset-mbr ~/Downloads/rhel-server-7.0-x86_64-dvd.iso /dev/sdb1
Verifying image...
/mnt/rhel-server-7.0-x86_64-dvd.iso:   14f3a6302e09a8fd9972c908a43a5e31
Fragment sums: a77a4a6ff19349fee89893a4fa6f3632b2cad759086938426fe67b9d2557
Fragment count: 20
Press [Esc] to abort check.
Checking: 100.0%
The media check is complete, the result is: PASS.
It is OK to use this media.
/Packages found, will copy source packages to target
Target filesystem (/dev/sdb1:) must be vfat, ext[234] or btrfs
[root@wireless ~]# mkfs -T ext4 /dev/sdb1
mke2fs 1.42.8 (20-Jun-2013)
Filesystem label=
OS type: Linux
Block size=4096 (log=2)
Fragment size=4096 (log=2)
Stride=0 blocks, Stripe width=0 blocks
491520 inodes, 1965824 blocks
98291 blocks (5.00%) reserved for the super user
First data block=0
Maximum filesystem blocks=2013265920
60 block groups
32768 blocks per group, 32768 fragments per group
8192 inodes per group
Superblock backups stored on blocks:
        32768, 98304, 163840, 229376, 294912, 819200, 884736, 1605632
Allocating group tables: done
Writing inode tables: done
Creating journal (32768 blocks): done
Writing superblocks and filesystem accounting information: done
.....................................
.....................................
Packages/seahorse-nautilus-3.8.0-5.el7.x86_64.rpm
        175,176 100%  285.12kB/s    0:00:00 (xfr#3582, to-chk=1044/4631)
.....................................
repodata/repomd.xml
          4,182 100%    4.96kB/s    0:00:00 (xfr#4556, to-chk=0/4631)
Waiting for device to finish writing
Updating boot config file
Installing boot loader
/media/tgttmp.CPZBRa/syslinux is device /dev/sdb1
Target device is now set up with a Live image!

This gives us a bootable RHEL 7 USB Media. However, if we used Fedora, Cent-OS and similar ISO that would also work.

livecd-tools on RHEL/Cent-OS systems can be limited and does not support ext4. For example,

# livecd-iso-to-disk --reset-mbr ~/Downloads/Fedora-Live-Desktop-x86_64-20-1.iso /dev/sdb1
Verifying image...
/home/User/Downloads/Fedora-Live-Desktop-x86_64-20-1.iso:   f8426bbbc374eb94d469175a3e9655f2
Fragment sums: e266b5eb16b33afe7ad21f695d8eb7d93a26753d5eb8a974a5bc41dcc621
Fragment count: 20
Press [Esc] to abort check.
Checking: 100.0%

The media check is complete, the result is: PASS.

It is OK to use this media.
USB filesystem must be vfat, ext[23]
Cleaning up to exit...

As a remedy to this problem, instead of creating ext4 in previous step, format using ext3 filesystem. Here’s the substitute for that command,

# mkfs -T ext3 /dev/sdb1

And then apply livecd-iso-to-disk command again which will succeed.

livecd-tools with fat32 filesystem

If you want fat32 filesystem instead of ext4 or ext3 you do not need to use mkfs command. Simply go ahead with following livecd command,

# livecd-iso-to-disk --format --msdos --reset-mbr ~/Downloads/Fedora-20-x86_64-Live-Desktop.iso /dev/sdb

Using livecd-tools to create UEFI bootable USB Stick

You need fat32 partition for EFI compatible bootable media. Directory structure changes too. Following command takes care of all of this,

# livecd-iso-to-disk --format --reset-mbr --efi /home/atiq/Fedora-Live-Cinnamon-x86_64-23-10.iso /dev/sdb
Verifying image...
/home/atiq/Fedora-Live-Cinnamon-x86_64-23-10.iso:   c07fca53758161c44b8800ae316b0852
Fragment sums: d7537f39df6c45f11dfb119497a2d7f12b9a813735e31574c8d1545e46f9
Fragment count: 20
Supported ISO: no
Press [Esc] to abort check.
Checking: 100.0%

The media check is complete, the result is: PASS.

It is OK to use this media.
WARNING: THIS WILL DESTROY ANY DATA ON /dev/sdb!!!
Press Enter to continue or ctrl-c to abort

/dev/sdb: 2 bytes were erased at offset 0x000001fe (dos): 55 aa
/dev/sdb: calling ioctl to re-read partition table: Success
Waiting for devices to settle...
mkfs.fat 3.0.27 (2014-11-12)
Copying live image to target device.
squashfs.img
  1,178,566,656 100%  336.51MB/s    0:00:03 (xfr#1, to-chk=0/1)
osmin.img
         12,288 100%    0.00kB/s    0:00:00 (xfr#1, to-chk=0/1)
Setting up /EFI/BOOT
Updating boot config file
Installing boot loader
Target device is now set up with a Live image!

The previous command restructures the partition table, formats and put files required for UEFI firmware. The filesystem on the usb disk looks like below,

# parted /dev/sdb print
Model: SCSI DISK (scsi)
Disk /dev/sdb: 4034MB
Sector size (logical/physical): 512B/512B
Partition Table: gpt
Disk Flags:

Number  Start   End     Size    File system  Name                  Flags
 1      1049kB  4032MB  4031MB  fat32        EFI System Partition  boot, legacy_boot, esp

Using livecd-tools to create Live USB Media with persistent storage

If the OS in ISO supports persistent storage then you can enable persistent storage depending on space available on the USB storage device. Following command prepares a Live USB Media with 1 GB persistent storage.

# livecd-iso-to-disk --overlay-size-mb 1024 --reset-mbr ~/Downloads/Fedora-Live-Desktop-x86_64-20-1.iso

Related Article

On this blog,  Creating Bootable USB Key of Puppy Linux with ext4 Filesystem

References

Caution: livecd-iso-to-disk damages partition table if device is used instead of partition table i.e., /dev/sdb instead of /dev/sdb1, EFI enabled live cd for usb boot. At least once, I found that though partition (specifically a partition number) was provided in command line it affected the device partition table because of wrong command.

Booting Linux using Windows Boot Manager

Adding an entry on BCDEDIT we can boot Linux using Windows (Vista or later) Boot Manager. As earlier OS such as Windows XP does not have bcdedit we can boot Linux by adding entry on boot.ini file.

For Windows Vista or Later, using BCDEDIT

Let’s discuss how to do this. First, we shall install Windows on the target PC. Then we shall take a backup of Windows MBR before installing Linux.

# dd if=/dev/sda of=winmbrbackup.bin bs=512 count=1

After that we shall install Linux. Then we restore Windows MBR.

# dd of=/dev/sda if=winmbrbackup.bin bs=446 count=1

In this stage, we install Linux MBR on Linux partition using grub-install command

# grub-install /dev/sdaX

For example, it is ‘sda9’ in my case.

# grub-install /dev/sda9

Let’s copy required boot information: mbr into a file which we will use later on Windows.

# dd if=/dev/sda9 of=rhelmbr.bin bs=512 count=1

Copy this file from Linux and put it into system partition such as C: drive.

We shall add an entry in Windows BCDEDIT for Linux. We have to open command prompt with administrator privilege and apply following command,

$ bcdedit /create /d "RHEL 6" /application BOOTSECTOR

This command will give an ID of the entry created. Use this ID on subsequent commands,

$ bcdedit /set {ID} device partition=C:
$ bcdedit /set {ID}  path \rhelmbr.bin
$ bcdedit /displayorder {ID} /addlast
$ bcdedit /timeout 20

If you are using Windows 8, it’s better to set bootmenupolicy to legacy so that OS Selection Menu is displayed during initial boot.

$ bcdedit /set {default} bootmenupolicy legacy

After restarting operating system you will be presented with option to boot Linux with Windows.

Earlier OS such as Windows XP

Opening boot.ini for edit can be little bit tricky. It might be set read-only. The file resides on C:\ drive. Windows XP boot.ini looks like this:

$ bcdedit /set {default} bootmenupolicy legacy[boot loader]
timeout=30 
default=multi(0)disk(0)rdisk(0)partition(1)\WINNT 
[operating systems] 
multi(0)disk(0)rdisk(0)partition(1)\WINNT="Microsoft Windows 2000 Professional" /fastdetect

Add a line like this in boot.ini to add linux entry,

C:\rhelmbr.bin="RHEL 6". 

References

Creating Bootable USB Key of Puppy Linux with ext4 Filesystem

Introduction to the Problem

There are several ways to create bootable USB Stick (flash drive) of puppy Linux. Using Windows it is possible to create bootable USB stick of& live puppy& using UNetBootin, Lili USB Creator etc software. These Windows USB Boot creator software require fat32 filesystem. With puppy Universal Installer we can create similar bootable devices using filesystems fat32, ext2 or ext3. However, if you want to create an ext4 filesystem in your usb flash drive and try to create bootable puppy USB stick using Puppy Universal Install you will see extlinux (part of syslinux used by puppy Universal Installer Script) displaying an error on the usb creator window which looks like this,

# extlinux -i /mnt/sdc1/
extlinux: cannot find device for path /mnt/sdc1/

The reason behind is that the extlinux of puppy does not work with ext4 filesystem. It cannot create extlinux configuration on ext4 filesystem. If we check the version of extlinux of Puppy Precise 5.4.3 we will find this,

# extlinux --version
extlinux 3.73 & Copyright 1994-2009 H. Peter Anvin

Another thing is that if you use ext2/3 filesystem you must select to install bootloader using mbr.bin Otherwise your USB key will not bootable.

The Solution

If you want to use ext4 filesystem to create bootable USB Key you must use another version of Linux. As my test OS I used Fedora 18. Here I am going to present how I succeeded, First, create an ext4 filesystem on the USB Key,

# mkfs -T ext4 /dev/sdXN

where X is device id, N is partition number. Typically if your USB flash drive is sdc it will be,

# mkfs -T ext4 /dev/sdc1
# e2label /dev/sdc1 PuppyLinux

Now mount the partition. Simply clicking the drive using File Manage will cause it to mount. Install extlinux configuration into the USB Key& using extlinux command.

# extlinux -i /run/media/UserName/PuppyLinux

Install bootloader on the USB Key,

# dd if=/usr/share/syslinux/mbr.bin of=/dev/sdX bs=446 count=1

Mount your puppy linux ISO. An example command may look like this,

# mount -o loop precise-5.4.3.iso /mnt/

From ISO mount target /mnt & copy following files to the USB Key,

  • help2.msg
  • puppy_precise_5.4.3.sfs
  • boot.msg
  • help.msg
  • logo.16
  • vmlinuz
  • initrd.gz

USB Key is bootable now. Restart the system and select appropriate boot device.

Version of extlinux in Fedora 18,

# extlinux --version
extlinux 4.05  Copyright 1994-2011 H. Peter Anvin et al

Using GRUB2 Recovery Console to Boot Linux

Since GRUB has been updated to version 2.0 on all community Linux Distributions I had to figure it out how to recover or boot into a Linux System when this new GRUB runs into issues and defaults to recovery console. Old commands which used to work on previous version of GRUB does not work on GRUB2.

Using GRUB2 we can boot into existing Linux System (due to partition table changes that is not booting directly) by setting prefix and root, loading the linux module and specifying the kernel and initrd.

First most important thing in the procedure of a recovery booting is to figure out the location of the root partition. It is easy to find if there is only one ext3/ext4 partition in the hard disk. Let’s see a demonstration,

Type ‘ls ‘ and then press tab. GRUB will list available partitions.

GRB2> ls [tab]

(hd0) (hd0,msdos11) (hd0,msdos10) (hd0,msdos9) (hd0,msdos8) (hd0,msdos7) (hd0,msdos5) (hd0,msdos1)

Let’s peek into the partitions (except hd0).

GRB2> ls (hd0,msdos11)/

Unknown partition type - ntfs

GRB2> ls (hd0,msdos10)/
bin   dev  home  lost+found  misc  net  proc  sbin     srv  tmp  var
boot  etc  lib   media       mnt   opt  root  selinux  sys  usr

(hd0,msdos10) is my Linux ext4 partition.

Let’s to set prefix and root.

set prefix=(hd0, 10)/boot/grub2
set root=(hd0,10)

To display the content of Linux partition you don’t need to specify partition number anymore.

GRB2> ls /
bin   dev  home  lost+found  misc  net  proc  sbin     srv  tmp  var
boot  etc  lib   media       mnt   opt  root  selinux  sys  usr

Changing the root and using ls command you can recognize your Linux partitions if you have multiple Linux partitions.

Now let’s insert the module which helps to boot Linux OS.

insmod (hd0,10)/boot/grub2/i386-pc/linux.mod

Let’s specify kernel and initrd to boot,

linux /boot/vmlinuz-3.5.3-1.fc17.x86_64 root=/dev/sda10
initrd /boot/initramfs-3.5.3-1.fc17.x86)64.img
boot

If you do mistakes on the root argument you won’t be able to boot.

Happy booting. :)

Last update: March 29, 2017

Related Links

  1. GRUB2 rescue guide

Windows XP Setup Error 0x0000007b in Dell Inspiron (n4110)

You may get following error message with code 0x0000007b trying to install Windows XP on a DELL Inspiron Laptop which means it cannot access the boot device.

To resolve the issue. You have to go to BIOS settings (F2 or Del key is the shortcut). Select advanced and change settings for SATA operation. Change it to ATA from AHCI. BIOS settings may look this image

BiOS Settings

The reason is that Windows XP doesn’t have driver for AHCI which is a new technology. To use AHCI in Windows XP you need the AHCI driver. It would be better if you have an OEM Windows XP which supports the AHCI storage.

Hope it helps.

How to mark a partition as active on Windows or Unix

All operating systems have the feature of marking partitions as active. I’ll provide helps for Windows, Linux and Unix (Solaris),

Windows

Using Windows XP to mark partitions

On Windows, we use the Windows Disk Management Tool to perform this,

  • Enter into disk management (click run from start menu and type diskmgmt.msc).
  • Right click the primary partition you want to mark as active.
  • Click Mark Partition as Active and it’s done.

The new active partition used by the System BIOS during next reboot.

Using Windows Vista/Seven to mark partitions

Click “Start Menu -> Programs -> Accessories”. Now right click on “Command Prompt” and rus as administrator. Now please type as following,

C:>  diskpart 
diskpart> select disk 0          // list command will list available disks 
diskpart> select partition 1     // list partition will list partitions 
diskpart> active                 // mark selected object as active 
diskpart> exit

You have to provide your own partition number instead of partition no. 1

If you are using Windows Vista be aware that Vista Boot Manager have bugs. It might behave unstable after changing active boot flags.

Using Linux to mark partitions

In Ubuntu/Fedora/Suse CD/DVD you have to use this command,

$ fdisk /dev/sdaX

where X = partition which you want to mark or unmark then use ‘a’ to modify active flag. Press w to store the modification upon completion.

How to mark another partition as active on Solaris

If you can boot into your Solaris OS, boot into Solaris System

Please enter following command to modify Solaris Root Partition,

# fdisk /dev/rdsk/c0d0p0

Depending on your disk configuration this can be c0d1p0 etc,

  • To select “Specify an active partition” please press 2.
  • You have to select the number of the partition you want to mark as active.
  • Afterwrds, please press 5 (to save changes and exit).

If you are using a Solaris DVD/CD or Solaris Live DVD or USB Boot you can still mark a partition as active from the console. First, boot into Solaris from the media. Then,

  • Select console
  • In console type the same commands we used previously with Solaris OS.

References

  1. How to Set or Mark a Partition as Active in Windows